
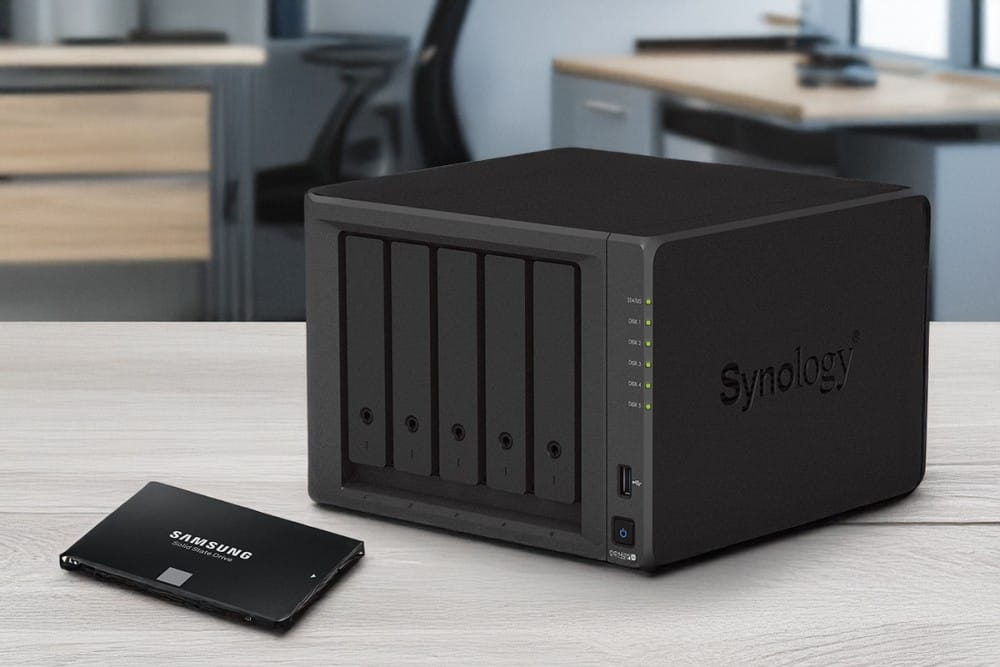
Synology NAS devices are well-loved for their user-friendly interfaces, wide-ranging functionality, and reliability. Yet, like any system relying on mechanical hard drives, they can face performance bottlenecks when managing random reads and writes. That’s where SSD caching steps in.
Today, I’m sharing everything I’ve learned about read caches, write caches, and pinning BTRFS metadata—strategies that can turbocharge your NAS for day-to-day tasks, backups, databases, and more.
Whether you’re new to Synology NAS administration or a seasoned pro looking to refine your setup, I’ll walk you through practical steps, real-world scenarios, and best practices.
You’ll discover why caching is so effective, how it integrates with Synology’s DSM, and how to tailor your cache size and configuration. It’s time to unlock the potential of SSD caching to make your NAS more responsive, less prone to latency, and better equipped for modern demands.
Understanding the Basics of SSD Caching
SSD caching on a Synology NAS is designed to bridge the gap between the affordability and high capacity of mechanical hard drives and the snappy, low-latency performance of solid-state drives. A NAS typically houses multiple hard drives in a RAID setup that excels at sequential reads but struggles with random I/O.
By introducing an SSD cache, you let the NAS store and retrieve frequently accessed data from faster flash storage—especially beneficial for tasks involving many small or random reads.
There are two main types of SSD caches: a read cache and a read-write cache. The first is simpler, requiring only one SSD.
The second helps both read and write operations but demands two SSDs in a mirror for data protection. We’ll explore each type in detail, then dive into BTRFS metadata pinning, which can take performance a step further.
Why Mechanical Drives Need a Speed Boost
Mechanical drives can read large, sequential files surprisingly quickly, especially if you have multiple drives working in parallel (such as in RAID 5 or RAID 6). But when a drive’s head has to jump around physically for small blocks of data scattered across the platters, performance suffers.
SSDs experience virtually no delay in moving between data locations. So, if you introduce a caching mechanism that stores commonly accessed data on SSDs, your system no longer waits on those mechanical heads to reposition. It’s a powerful way to transform random reads from a slow, mechanical bottleneck into a near-instantaneous operation.
Read Cache vs. Read-Write Cache
The Value of a Read Cache
A read cache uses one SSD to store copies of frequently accessed data blocks. When you request that data again, it’s served directly from the SSD rather than the slower mechanical pool. Because this cache is just a copy, there’s no risk of data loss if the SSD fails. The system simply returns to reading from the spinning disks.
This setup is especially useful for random reads. Large sequential reads, like copying big media files, don’t benefit as much because they’re already handled efficiently by the RAID of mechanical drives. However, for tasks like database lookups, Docker containers, or indexing numerous small files, you’ll notice a snappy response time with a read cache enabled.
The Potential of a Read-Write Cache
A read-write cache goes further by handling new write operations on SSDs. Rather than sending random writes directly to the mechanical pool, the system places them on a mirrored pair of SSDs (for redundancy).
Later, it flushes that data to the HDDs more efficiently. This can dramatically speed up workloads with many small write operations, like backups, virtualization, or frequent database commits.
Because active data “lives” temporarily on the SSDs, you need at least two SSDs to protect against drive failure. Removing or losing one drive in a read-write cache without following proper procedures can result in data corruption. That’s why read-write caches add complexity and require extra caution.
Pinning BTRFS Metadata: A Performance Game-Changer
Synology often utilizes the BTRFS file system, which relies on a B-tree to track file locations, snapshots, and changes. Every time you modify or add a file, BTRFS updates this tree. On mechanical drives, countless small writes to the B-tree can bog things down. This is where pinning BTRFS metadata to SSDs excels.
When you choose to pin metadata, it lives on the read-write cache. Your mechanical drives handle the bulk of large sequential data, while your SSDs perform frequent updates to the B-tree.
This lowers latency for write-heavy operations, including Time Machine backups, Active Backup for Business, and similar tasks where many small files or metadata changes occur.
Real-World Scenarios: Where SSD Caching Shines
I’ve frequently seen users mistake SSD caching for a magic solution to improve all file transfers. It’s important to remember that SSD caching is particularly useful for random read or write operations. Here are scenarios where you’ll notice a real impact:
- Frequent Small File Access: If your NAS hosts Docker containers, apps, or numerous small Word docs, a read cache will accelerate random lookups and indexing.
- Video Editing: A read cache can help professionals scrubbing through large media files, especially when editing software performs multiple random reads for metadata.
- Database Operations: Databases often need to retrieve scattered data quickly. An SSD cache offsets mechanical latency, speeding up queries and transactions.
- Time Machine or Other Backup Solutions: With a read-write cache, especially pinned BTRFS metadata, you can significantly shorten the time it takes to back up or version large sets of small files.
When SSD Caching Might Not Help
If you already have an all-SSD storage pool, adding an additional SSD cache offers minimal benefits and might even reduce efficiency. Large sequential file operations also don’t improve much from caching because mechanical disks read massive, continuous data quickly anyway, and the cache is optimized for random I/O.
Similarly, if your daily tasks mostly involve copying a single large media file once a week, you may not notice any difference. Synology’s caching algorithms focus on repeating random reads and writes, so an occasional file transfer stays unaffected.
NVMe vs. SATA: Which SSD is Right for Caching?
Many Synology NAS models have M.2 NVMe slots, which allow you to use high-performance SSDs directly on the PCIe bus. NVMe drives offer ultra-low latency and higher IOPS—perfect for random read/write acceleration. In contrast, SATA SSDs are typically limited by the older SATA protocol’s overhead, which was originally designed for mechanical drives.
SATA SSDs can still help, but if your NAS has the option for NVMe, you’ll see stronger results. Especially when you want to combine a read-write cache with BTRFS metadata pinning or run multiple Docker containers, lower latency makes a big difference.
Power Loss Protection Considerations
For mirrored read-write caches, an SSD with power loss protection (PLP) is highly recommended. This capacitor-based feature ensures any in-flight data is properly written to the NAND if power is suddenly lost.
Without PLP, your NAS might think data is safe on the SSD when it’s still in volatile RAM on the drive itself. That can lead to corruption if the SSD loses power mid-write.
A strong Uninterruptible Power Supply (UPS) further reduces risk. Together, PLP on the SSD and a UPS for your NAS mitigate data loss scenarios where a read-write cache is in active use.
Step-by-Step: How to Set Up an SSD Cache in DSM
Synology’s DiskStation Manager (DSM) makes adding an SSD cache straightforward, but you should follow a few best practices to avoid issues. Here’s a detailed overview of the setup process.
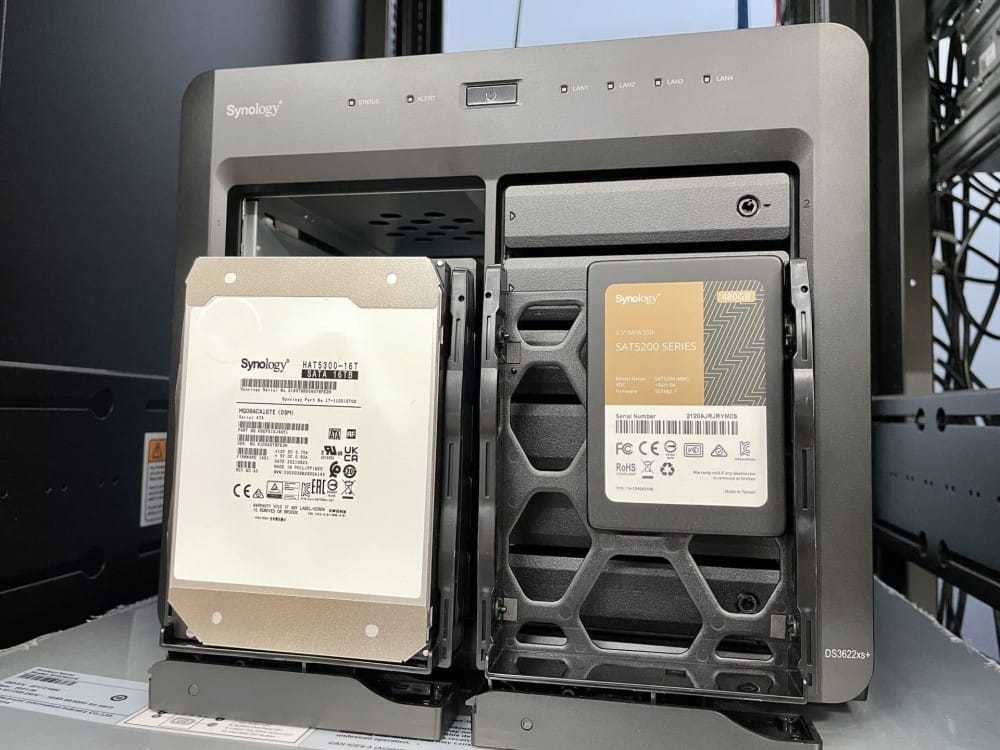
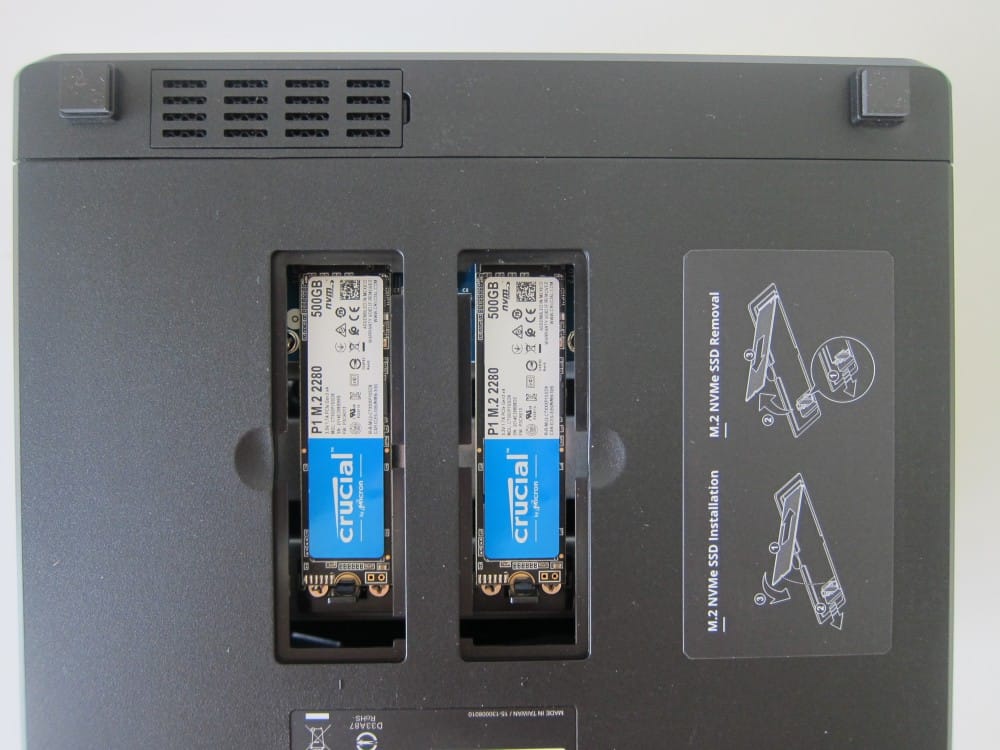
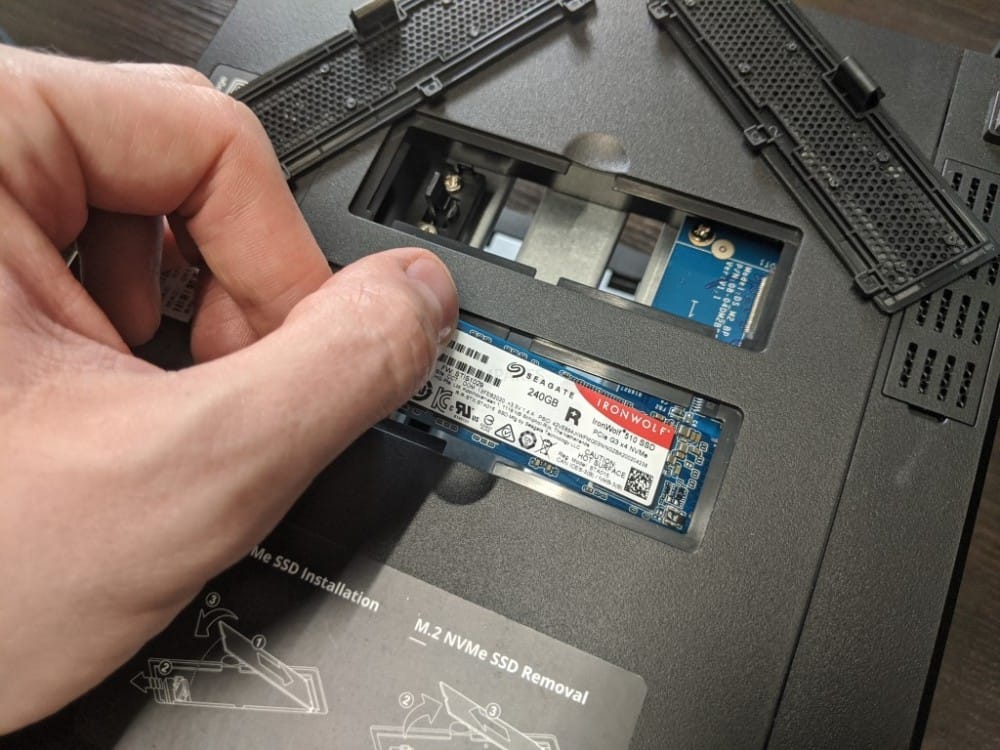
1. Install the SSD into Your NAS
- Power off the NAS: Always shut down properly.
- Open the enclosure: Depending on your model, you may have a removable bottom or front-loading slots.
- Insert the SSD: Align the M.2 NVMe or SATA SSD in the appropriate slot.
- Secure the hardware: Use the provided screw or clip to keep the drive in place.
- Reconnect power: Then boot up the Synology device.
2. Create the Cache in Storage Manager
Once the NAS boots, log into DSM and open Storage Manager. You should see the new SSD under the list of drives. Then follow the Cache Creation Wizard:
# Example Steps from DSM
1. Go to Storage Manager > SSD Cache
2. Click "Create"
3. Choose the volume to accelerate
4. Select "Read-only" or "Read-write" cache
5. For read-write, pick two SSDs for a mirrored cache
6. (Optional) Pin BTRFS metadata if needed
7. Allocate the cache size and confirm
Consider leaving a portion of the SSD unallocated—10 to 20 percent free space can improve performance and longevity. If you’re creating a read-write cache with pinned BTRFS metadata, confirm your SSD has power loss protection and that you have a UPS in place.
3. Monitor and Fine-Tune Settings
After the initial setup, go to Resource Monitor in DSM, enable Usage History, and track I/O usage. You’ll see metrics like cache hit rate (for random reads) and overall disk load. Give the system time to “learn” your usage patterns. The more your NAS uses the same random blocks of data, the higher your hit rate will become.
# In DSM:
# 1. Open Resource Monitor
# 2. Go to Settings
# 3. Enable "Usage History"
# This allows you to chart performance trends and watch your SSD cache fill up.
If you notice diminishing returns or low RAM, you can remove or reduce the cache size in Storage Manager. For pinned metadata, check that the size suffices to hold your BTRFS structure. If your dataset is huge—tens of terabytes or more—you may require a larger SSD pool than someone with a smaller volume.
Performance Metrics and Common Misconceptions
Cache Hit Rate is one of the most misunderstood metrics. It represents the percentage of random reads served by the SSD instead of mechanical disks. A high cache hit rate doesn’t mean all data is served from the SSD—it only applies to random I/O. When you move a massive movie file or disk image, sequential reads rarely benefit, so the cache hit rate might not reflect that transfer.
Another misconception is that adding an SSD cache automatically delivers faster large file copy speeds. Mechanical RAID pools already handle large sequential reads very efficiently, so big transfers might not see improvements in raw throughput. The real gains appear in random, small-block operations—scenarios where mechanical drives are truly at a disadvantage.
Expanding Your Knowledge: Deeper Dive into BTRFS Metadata
Pinning BTRFS metadata is a more advanced topic, but incredibly valuable in the right environment. When you modify a file, BTRFS updates the metadata’s “B-tree.” Imagine thousands of small writes for directories, snapshots, or backups.
This overhead on mechanical disks can slow everything down. Storing the B-tree on an NVMe-based read-write cache leads to near-instant updates, freeing your HDDs to handle sequential data only.
Backup solutions like Time Machine or Active Backup for Business frequently change many small files (incremental updates, versioning). For these tasks, pinning metadata can significantly speed up how quickly your system processes each backup iteration. You’ll notice that the typical slowdown or “hang” during backups is greatly reduced.
How Large Should a Metadata-Pinned Cache Be?
One challenge is deciding how big your read-write cache must be to hold the entire BTRFS tree. For smaller volumes (a few terabytes), a 500 GB SSD is often enough. Larger volumes, especially over 100 TB, might need more. Synology’s SSD Cache Advisor can provide an estimate, though it might be conservative. Monitor usage in Resource Monitor to see if your cache saturates quickly.
Practical Use Cases: How SSD Caching Helps
1. Synology Drive Indexing
Synology Drive syncs and indexes files for each user, requiring multiple small read operations to confirm file changes and updates. A read cache can store commonly accessed blocks, while a read-write cache can handle updated metadata if pinned. In busy multi-user environments with constant file changes, an SSD cache can greatly reduce indexing times.
2. Active Backup for Business and Time Machine
Both solutions can create heavy random write traffic on your volume as new revisions and file changes are saved. With a read-write cache, these operations are sent to fast SSDs before being written back to the HDDs.
Pinning BTRFS metadata ensures the overhead of updating the file system’s B-tree isn’t forced onto spinning disks. The result? Faster backups and less strain on your mechanical drives.
3. Running Databases or Virtual Machines
Databases thrive on low-latency random reads and writes for quick query responses. An SSD cache can store frequently accessed data tables, indexes, or logs, dramatically cutting down on mechanical seek delays. If you run small VM images, the random I/O from a hypervisor might be similarly improved.
Remember, for write-heavy workloads, you’ll need a read-write cache and possibly pinned metadata. Make sure you have redundant SSDs and a reliable power solution if your environment depends on consistent uptime and data protection.
Smart Sizing: How Big Should Your SSD Cache Be?
Many people ask if more cache is always better. While a larger cache can handle more random data, you may see diminishing returns if your working set (the data you frequently access) isn’t that big. A 500 GB NVMe drive can be enough to handle many use cases, including mid-sized business workloads.
That said, if you suspect your environment has large sets of frequently accessed data, consider the following:
- Check Cache Hit Rate Over Time: If the hit rate stays high and your SSD is frequently near capacity, you might benefit from a bigger drive.
- Use Synology’s Cache Advisor: Though not always precise, it can provide a starting point to gauge cache size needs based on typical usage.
- Plan for Growth: If you anticipate your usage scaling, a slightly larger SSD can save future hassle.
Common Pitfalls and How to Avoid Them
Uninterruptible Power Supply (UPS)
For read-only caches, a power outage is unlikely to cause data loss. For read-write caches, however, data might be on the SSD and not yet written to HDD. A UPS lets you gracefully shut down the NAS, preventing corruption. If your environment is mission-critical, a UPS should be on your shopping list.
Mirroring SSDs
It’s tempting to buy a single SSD and use read-write caching to boost writes. But a solitary cache drive can’t protect incomplete writes if it fails. Always mirror two SSDs for read-write caches to guard against drive loss. Remember to properly remove the cache via DSM before physically taking out any drive.
Expectations About Sequential Throughput
SSD caching can’t magically make your spinning disks saturate a 10 Gbps connection if your main workload is copying huge ISO images or raw video files. For large sequential operations, mechanical arrays are already decent. Caching focuses on random I/O, improving tasks reliant on quick, repetitive reads or writes scattered around the disk.
Realistic Outcomes: What You’ll Experience
Don’t be discouraged if you don’t see a big jump in your large file transfer speeds after enabling an SSD cache. The best way to notice your gains is to watch how quickly a routine task (like a backup or indexing job) completes after some days of “learning” from the new cache.
Also, measure how the system handles concurrent tasks. Where you’d normally hear your drives thrashing with random reads, you may now find everything running smoothly.
Indexing in Synology Drive can become far less sluggish, and Time Machine backups may finish faster, especially if multiple Mac clients are backing up frequently. You might also see a more responsive DSM interface if you run additional packages on the same volume—like a local database or content management system.
Concluding Thoughts on SSD Caching with Synology NAS
SSD caching isn’t a catch-all solution, but it can be transformative for the right usage patterns. If your NAS performs countless small, random I/O operations—synced folders, virtualization, backups, databases—leveraging an SSD cache can significantly boost performance. Pinning BTRFS metadata further refines the process by moving complex file system updates off slow spinning disks.
A simple read-only cache is the safest first step. It delivers tangible benefits with no risk of losing unwritten data if the SSD fails. When you need to go further—handling large-scale backups or frequent random writes—a mirrored read-write cache with power loss protection is your best bet. Just keep an eye on sizing, ensure you have a UPS, and choose SSDs specifically rated for caching duties.
Ultimately, the decision comes down to your environment. By understanding how caching works, planning your setup, and monitoring usage, you can tailor a system that’s both flexible and powerful.
From my experience, a well-tuned SSD cache makes routine tasks practically seamless and saves you from the classic “hard drive thrash” that often plagues heavy-lifting storage tasks.
