

I’m here to walk you through a simple yet powerful way to improve your network security and boost ad blocking by installing Pi-hole v6 using Docker Compose. This guide also shows you how to tunnel your DNS traffic through Cloudflare, so your ISP stays out of the loop while you stay in control. I’ve tested this setup myself and found it both reliable and efficient.
In this post, you’ll learn how to configure the new Pi-hole version with advanced filtering, an improved dashboard, and the built-in features that make it stand out. I’ll also cover a Docker Compose file you can use to get Pi-hole v6 and Cloudflare working together. Let’s dive right in.
Why Choose Pi-hole v6 for DNS Filtering?
Pi-hole v6 takes network security and ad blocking to another level. Its embedded web server, REST API, and redesigned interface make it slick, easy to maintain, and highly effective at blocking unwanted content. Below are some reasons why I recommend Pi-hole v6 over previous versions:
- Faster Performance: Pi-hole v6 is written to run as a lightweight service, so resource usage is minimal.
- Advanced Filtering: Manage both blocklists and allowlists with more precision than older versions.
- Single Configuration File: Simplifies setup by consolidating multiple configs into a single TOML file.
- Built-in HTTPS Support: Generate SSL certificates directly, although I typically use a reverse proxy for simplicity.
- Efficient Docker Image: Now based on Alpine, reducing image size and improving load times.
I’ve found Pi-hole v6 to be easy on system resources while offering improvements in domain blocking, DNS queries management, and local DNS resolution. The new user interface feels familiar yet modern, making it simple for newcomers to navigate.
Key Improvements in Pi-hole v6
When Pi-hole v6 arrived, it came with foundational changes that set it apart from previous versions. Here’s a brief overview of what’s new and exciting:
Embedded Web Server and REST API
The previous Pi-hole setup required external services like lighttpd and PHP. Now, everything is integrated into Pi-hole’s core binary, including an embedded web server. This change reduces resource usage and complexity, streamlining how you manage DNS filtering and advanced settings.
Advanced Filtering with Allowlists
Pi-hole v6 introduces a more robust way to handle both blocklists and allowlists. You can now allow domains selectively, flipping the usual “deny-only” approach. This is especially handy if you want to ensure certain domains are always reachable, even when blocklists are strict.
Redesigned Interface
The user interface gets a face-lift, but it still feels familiar. I find that navigation is smoother, and the layout is clearer. You’ll quickly see features like Query Logs, DNS settings, and Gravity (the blocking engine) are easy to access, making day-to-day management far simpler.
Setting Up a Cloudflare Tunnel for Pi-hole v6
Routing Pi-hole v6 through a Cloudflare tunnel adds a layer of privacy. This approach encrypts DNS queries so your ISP can’t see which websites you’re resolving.
Instead, Cloudflare becomes the only outside service that knows your DNS queries. This might not be for everyone, but if you’re privacy-conscious, it’s worth considering.
Docker Compose Configuration for Pi-hole v6
Below is a Docker Compose file I use as a foundation for Pi-hole v6. It includes a Cloudflare DNS proxy container and Pi-hole itself.
I recommend reviewing each section to adapt it to your environment, including replacing any placeholders like
version: '3'
services:
  cloudflared:
	container_name: cloudflared
	restart: unless-stopped
	image: cloudflare/cloudflared:latest
	command: proxy-dns
	environment:
	  - "TUNNEL_DNS_UPSTREAM=https://1.1.1.1/dns-query,https://1.0.0.1/dns-query,https://9.9.9.9/dns-query,https://149.112.112.9/dns-query"
	  - "TUNNEL_DNS_PORT=5053"
	  - "TUNNEL_DNS_ADDRESS=0.0.0.0"
	networks:
	  pihole_internal:
		ipv4_address:
	security_opt:
	  - no-new-privileges:true
  pihole:
	container_name: pihole
	image: pihole/pihole:latest
	ports:
	  - "53:53/tcp"
	  - "53:53/udp"
	  # - "67:67/udp"   # Uncomment if you plan to use Pi-hole DHCP
	  - "500:80/tcp"
	  # - "443:443/tcp"
	networks:
	  pihole_internal:
		ipv4_address:
	  proxy:
	environment:
	  TZ: 'Europe/Prague'
	  FTLCONF_webserver_api_password: ''
	  FTLCONF_dns_listeningMode: 'all'
	  FTLCONF_dns_upstreams: '#5053'
	volumes:
	  - '/home/ubuntu/docker/pihole/:/etc/pihole/'
	  - '/home/ubuntu/docker/pihole/etc-dnsmasq.d/:/etc/dnsmasq.d/'
	restart: unless-stopped
	depends_on:
	  - cloudflared
	labels:
	  - "traefik.enable=true"
	  - "traefik.http.routers.pihole.entrypoints=http"
	  - "traefik.http.routers.pihole.rule=Host(``)"
	  - "traefik.http.middlewares.pihole-https-redirect.redirectscheme.scheme=https"
	  - "traefik.http.routers.pihole.middlewares=pihole-https-redirect"
	  - "traefik.http.routers.pihole-secure.entrypoints=https"
	  - "traefik.http.routers.pihole-secure.rule=Host(``)"
	  - "traefik.http.routers.pihole-secure.tls=true"
	  - "traefik.http.routers.pihole-secure.service=pihole"
	  - "traefik.http.services.pihole.loadbalancer.server.port=80"
	  - "traefik.docker.network=proxy"
networks:
  pihole_internal:
	ipam:
	  config:
		- subnet: 172.70.9.0/29
	name: pihole_internal
  proxy:
	external: true
I typically keep the Cloudflare container and Pi-hole on an isolated private network. This reduces the risk of exposing Pi-hole directly to the internet.
You can then attach an external proxy network (like proxy in the snippet) for routing traffic through a reverse proxy of your choice, such as Traefik or Nginx Proxy Manager.
Deploying Pi-hole v6 with Docker Compose
After customizing the Docker Compose file to match your environment, head over to your project folder in a terminal. Run the following command to bring the stack online:
docker-compose up -d
This command pulls the latest images (if you don’t already have them), sets up the networks, and starts your containers. Once the process finishes, you can confirm everything is running using:
docker-compose ps
Getting Started with the Pi-hole v6 Dashboard
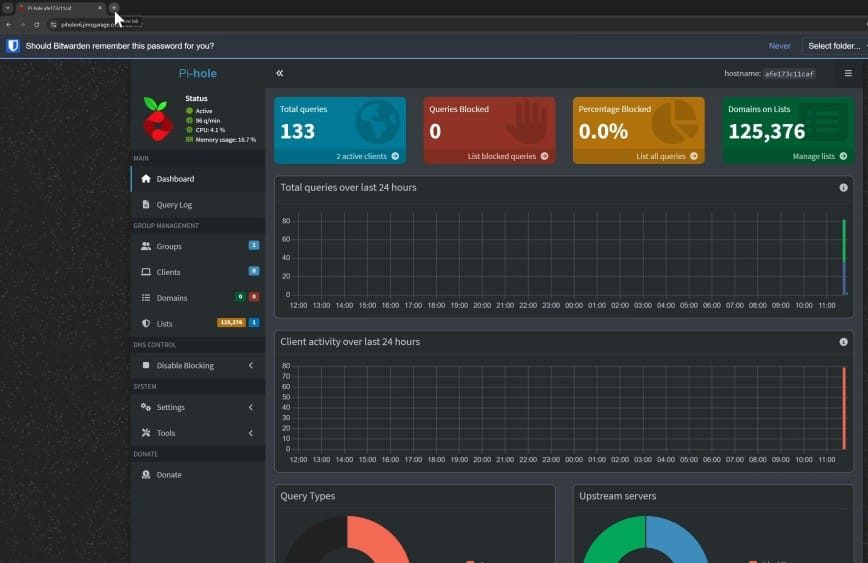
Once your containers are live, open your browser and navigate to http://<your-domain.com>/admin. You should see the new Pi-hole v6 dashboard. Log in using the password specified under FTLCONF_webserver_api_password in your Docker Compose file.
Exploring Key Dashboard Sections
The Pi-hole interface includes several sections to manage DNS filtering, blocklists, allowlists, and other advanced filtering tasks:
- Dashboard: Provides a quick overview of DNS queries, blocked domains, and network traffic.
- Query Log: Shows all requests passing through Pi-hole, along with whether they’re allowed or blocked.
- Groups & Clients: Tailor filtering rules to specific clients or device groups.
- Domain Manager: Manage domains more granularly, whether you want a wildcard approach or specific entries.
- Lists: Add new blocklists or allowlists to refine your filtering strategy.
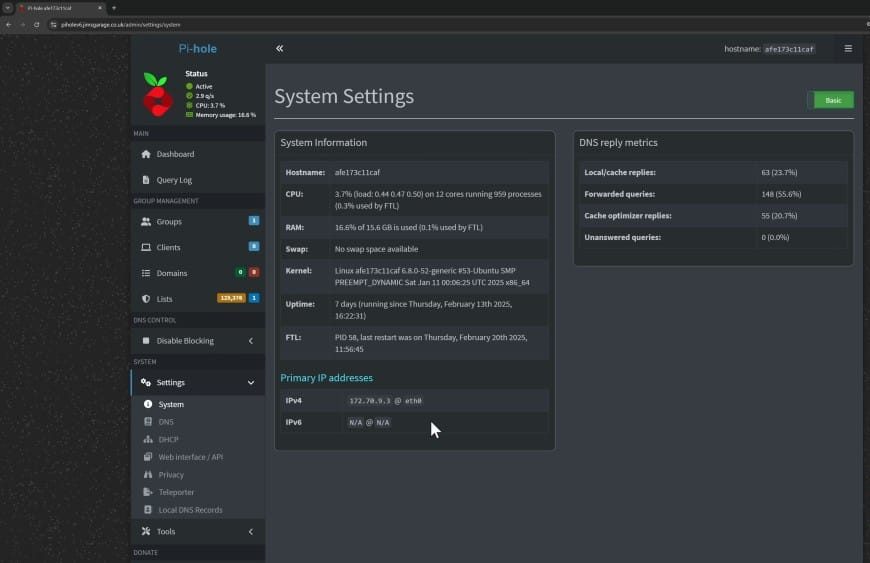
- Settings: Access DNS configurations, advanced web server configurations, logging, and more.
My personal favorite addition is how easy it is to manage custom lists. Whether you’re blocking ads, trackers, or malicious domains, the new structure makes these configurations feel effortless.
Upstream DNS and Cloudflare
Your Docker Compose file points Pi-hole’s upstream DNS to the Cloudflare container (the internal address on port 5053). This setup funnels all DNS queries over an encrypted tunnel, preventing ISPs from snooping on your traffic.
However, Cloudflare can still see what’s happening because it’s your DNS provider. Decide if this approach aligns with your privacy preferences.
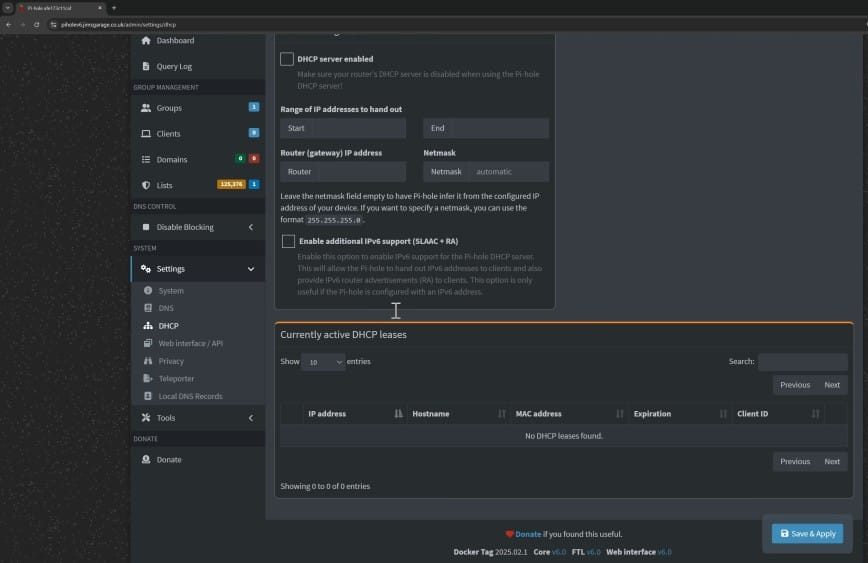
Enabling DHCP (Optional)
If you want Pi-hole to handle DHCP as well as DNS, edit your Docker Compose file to expose port 67/udp and add the NET_ADMIN capability. Next, access the “Settings” > “DNS” or “DHCP” tab in the Pi-hole dashboard to turn on DHCP. You can then disable the DHCP service on your router so Pi-hole takes over.
Migrating from Pi-hole v5 to v6
Curious about upgrading from an older Pi-hole version? Here’s what I did when experimenting with a test environment:
- Backup Old Configs: Export your existing Pi-hole v5 settings via its teleporter feature. This includes blocklists, allowlists, and local DNS records.
- Stop Old Container: Bring down your Pi-hole v5 container so it doesn’t conflict on port 53.
- Use the Same Volumes: Point Pi-hole v6 to the same volume mounts. Pi-hole should automatically detect and migrate your old configs if everything is supported.
- Verify Everything Works: Test DNS resolution, check your blocklists, and ensure the user interface loads. You can also import your teleporter backup if needed.
Troubleshooting Pi-hole v6
Although Pi-hole v6 is stable, you might run into a few snags during setup. Here are some common issues and fixes:
- Port Conflicts: If your system already has DNS or a web server running, Pi-hole might not start. Free up ports 53 and 80 or change them in the Compose file.
- Cloudflare Tunnel Not Connecting: Double-check your
TUNNEL_DNS_UPSTREAMenvironment variables. Ensure the container has network access. - DNS Leaks: Verify your local devices actually point to Pi-hole’s IP for DNS resolution. Sometimes your router or DHCP can override these settings.
- Volume Permissions: Make sure the Docker user has write access to the host directories mapped to
/etc/piholeand/etc/dnsmasq.d.
What’s New in Pi-hole v6 (Official Release Highlights)
Embedded Web Server and REST API: Pi-hole v6 now ships with a built-in web server and a reworked API under one binary. The result is a smaller footprint, snappier performance, and a more refined experience in the query log, thanks to server-side pagination. Lua has also been integrated, enabling further customization of the interface.
Advanced Filtering and Allowlists: Alongside classic blocklists, Pi-hole v6 brings in “Antigravity” lists for whitelisting. These subscribed allowlists let you specifically permit domains without juggling a huge whitelist file, making it easier to bypass certain blocking rules.
Consolidated Configuration Files: Multiple settings have been combined into a single TOML file at /etc/pihole/pihole.toml, making everything easier to track. If you’re upgrading from v5, your existing settings will migrate automatically. You can adjust configurations by editing the TOML file, using commands like pihole-FTL --config, or leveraging the API or environment variables.
Redesigned User Interface: Settings are now split into Basic and Expert modes, so you can dial in just the right level of detail. This layout overhaul accommodates both newcomers and power users, providing a smoother experience for all.
HTTPS Support: Pi-hole v6 can self-generate HTTPS certificates or let you plug in your own. If you’ve been wanting a secure-by-default approach for your DNS dashboard, you can now set it up without needing external web servers.
Docker Improvements: The base image now relies on Alpine, drastically reducing size. It’s a leaner solution that also sets the stage for more flexible system support in the future.
Conclusion
Pi-hole v6 brings a fresh, efficient approach to ad blocking and DNS filtering. Combining Pi-hole v6 with a Cloudflare tunnel provides extra privacy if you want to cloak your DNS traffic from your ISP.
Whether you’re tackling advanced filtering with allowlists or setting up the new interface, Pi-hole v6 is a step forward for anyone looking to manage their DNS in a home lab or self-hosted environment.
I recommend giving Pi-hole v6 a try, especially if you’re already a fan of previous versions. With Docker Compose, the entire setup is straightforward, repeatable, and easy to maintain.
If you plan carefully, you’ll be up and running in no time with advanced DNS filtering, ad blocking, and all the new bells and whistles Pi-hole v6 has to offer.
