
Upgrading an M4 Mac Mini with a third-party SSD can dramatically boost storage capacity and performance. In this post, I’ll share my personal experience replacing the stock SSD with a new 2TB drive. You’ll learn every step needed, from hardware installation to system flashing with Apple Configurator. If you’ve ever wondered how to expand your Mac Mini M4’s storage on your own, you’ve come to the right place.
Why Upgrade the M4 Mac Mini with a Third-Party SSD?
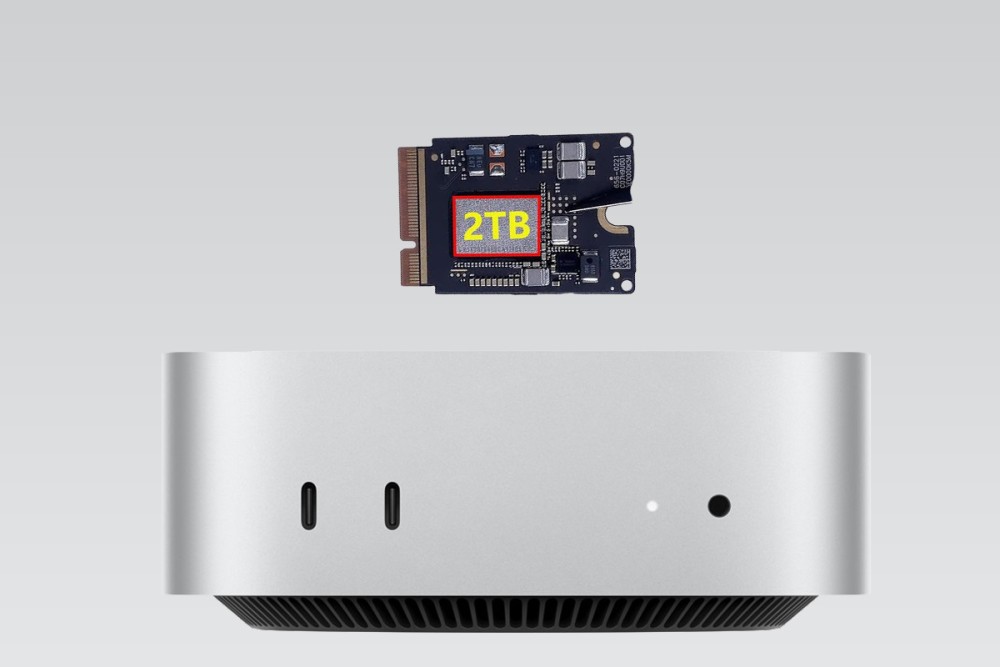
The M4 Mac Mini is a powerful machine, yet some of the base models ship with limited storage that might not meet everyone’s needs. A third-party SSD replacement offers a budget-friendly way to supercharge your device. By performing this upgrade, you can jump from a standard 256GB disk to a roomy 2TB drive, making room for all your apps, large files, and creative projects.
Additionally, third-party SSDs often utilize advanced NAND or solder memory chips, delivering faster read and write speeds. This leads to snappier application load times, smooth file transfers, and more efficient workflows. Below, I’ll show you how to handle both the hardware installation and the macOS reinstall through DFU mode using Apple Configurator.

Important Notes Before Starting
I recommend signing out of your Apple ID on your M4 Mac Mini before removing the original SSD. That way, you won’t run into accidental activation or ID issues later. If you forget to sign out, you might need extra steps to reset Apple ID settings.
Make sure you have a second Mac computer on hand, since we’ll be using Apple Configurator to flash the system onto the new drive. Gather all tools and cables beforehand, and prepare for some careful disassembly work.
Hardware Installation Steps
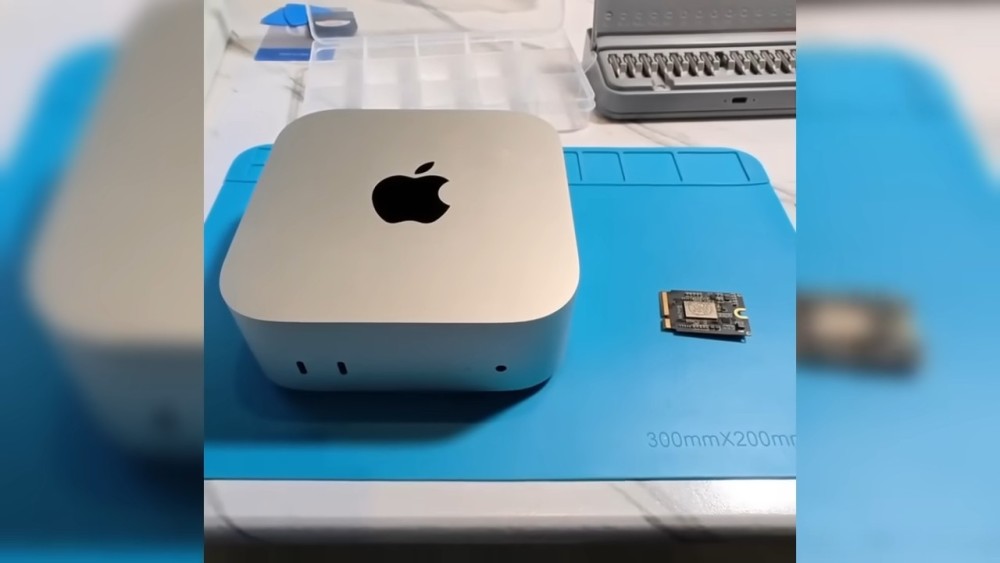
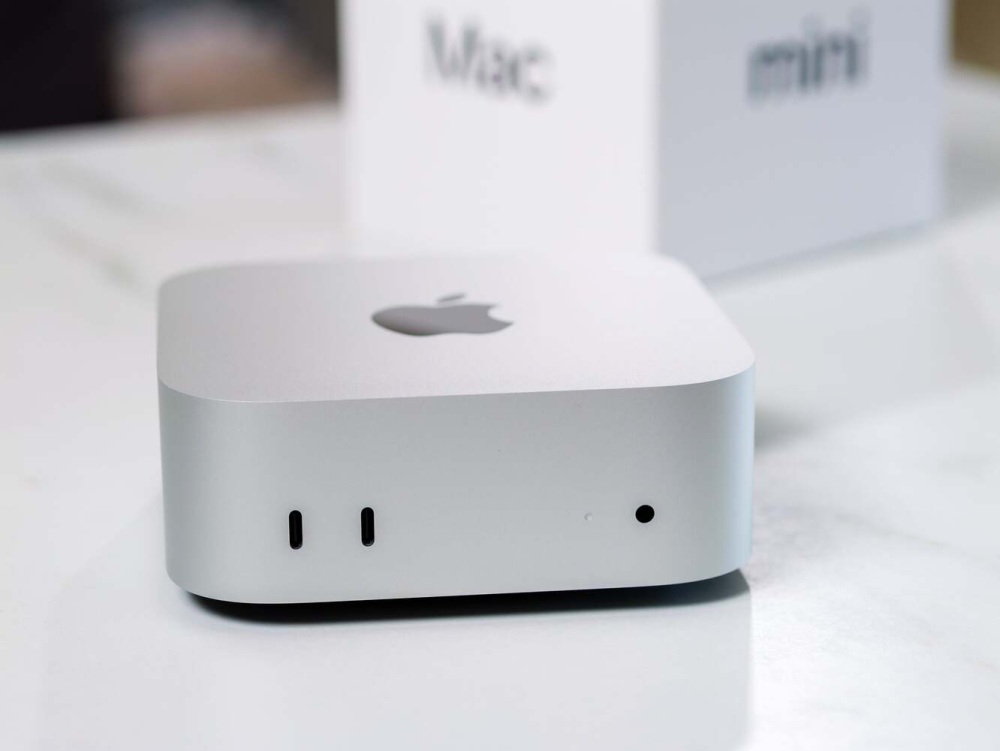
Step 1: Removing the Case
First, you’ll remove the M4 Mac Mini’s bottom case. Gently pry it open near the power button with a thin metal sheet or plastic pry tool. The case is secured by clips that can be delicate, so use steady, gentle force.
Once you’ve opened a corner, insert a plastic separator to keep that section from snapping back. Continue prying along the edges until the bottom plate comes free. Be careful with the power button cable attached inside. Gently release any clips holding it down.
Readers also liked:
M4 MacBook Air Review: The Best Laptop Deal of 2025?
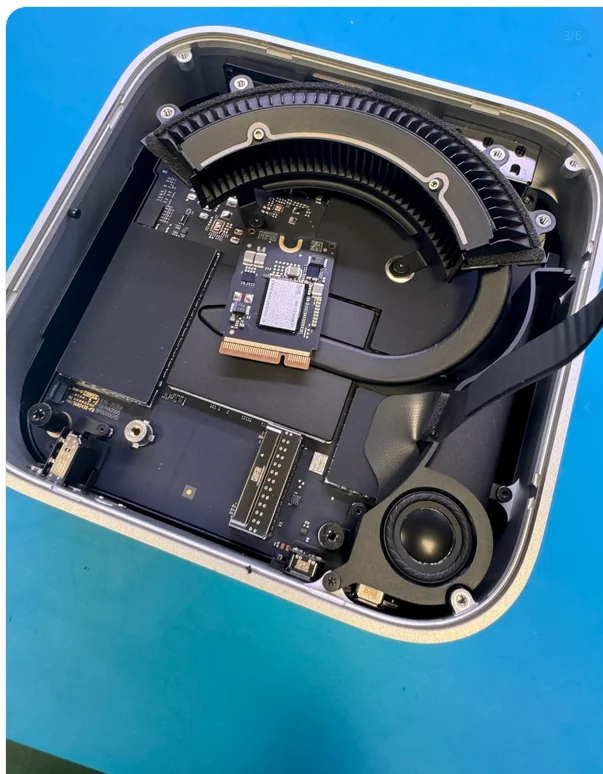
Step 2: Removing the Original Drive
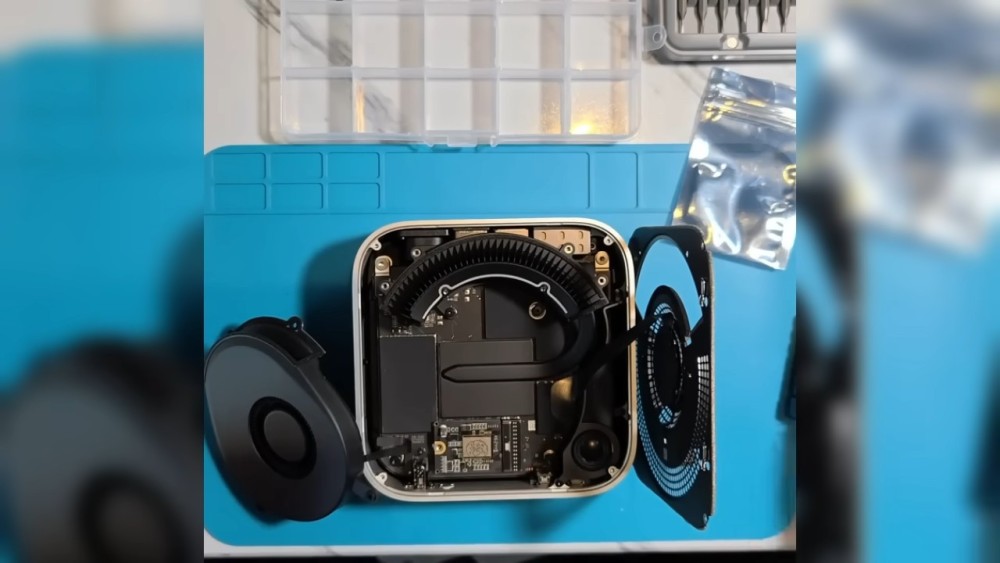
Inside, you’ll see the fan assembly and the stock SSD. Unscrew the fan and the original drive’s mounting screws. Keep all screws organized to avoid confusion later. Carefully lift and slide the drive out of its connector, noting its orientation. Typically, the side with more visible circuits faces up, but observe your drive for reference.
If you see delicate cables connected around the fan or mainboard, take care not to tug or bend them too forcefully. These cables can be pricey and difficult to repair if damaged.
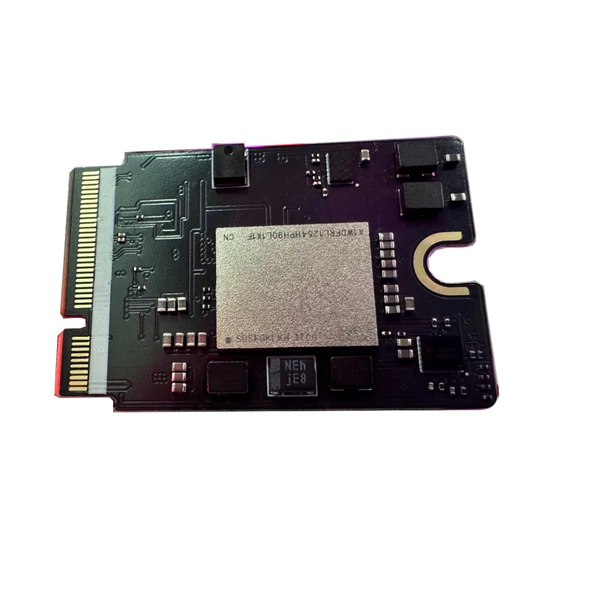
Step 3: Installing the Third-Party SSD
Align the new SSD’s connector with the slot where the original drive was seated. Gently slide it in, ensuring the gold contact notch matches. Once it’s in place, secure the drive with screws. Reattach the fan (if you removed it) and reconnect the power button cable. Double-check everything is secure but avoid overtightening.
Before closing the case, it’s wise to do a quick visual inspection. Make sure no cables are pinched, and that all connectors remain firmly attached. Once satisfied, align the case’s clips and press it back into place with gentle pressure around the edges.
DFU Mode and System Flashes
With the new SSD physically installed, you’ll need to flash macOS onto it. This process pairs your M4 Mac Mini’s CPU with the new drive and reinstalls the operating system. You’ll use Apple Configurator on a separate Mac to handle this part.
Step 1: Setting Up Apple Configurator
On your second Mac, download Apple Configurator from the official Apple website or the Mac App Store. Once it’s installed, open the software. You’ll also want the latest IPSW file for the M4 Mac Mini. This file is the macOS system image Apple Configurator uses for the reinstall.
Step 2: Connecting Cables
Use a Thunderbolt 4 or USB-C data cable to connect the M4 Mac Mini to the second Mac running Apple Configurator. Make sure you plug the cable into the correct Thunderbolt port on the M4 Mac Mini (the port typically marked with a Thunderbolt icon). For video output, connect your monitor (if you want to see what’s happening) to another USB-C or HDMI port on the M4 Mac Mini.
Ensure the M4 Mac Mini is completely powered off before proceeding. That means no power cable attached. This is essential to properly trigger DFU mode.
Step 3: Entering DFU Mode
To enter DFU mode, press and hold the M4 Mac Mini’s power button. While continuing to hold the button, plug in the power cable. Keep holding the power button until you see a yellow or flashing indicator light on the front (or until Apple Configurator on the other Mac recognizes the device in DFU mode).
Readers also liked:
M4 Mac Mini vs Pro: What I Wish I Knew Before Choosing
Step 4: Restoring macOS
In Apple Configurator, you’ll see the M4 Mac Mini icon appear in the DFU list. Right-click it and choose “Restore.” If you have the IPSW file already, drag and drop it into Apple Configurator, or let the software download the file for you.
Apple Configurator will handle the rest, downloading or validating the system image and flashing it onto the Mac Mini. Depending on your network speed, the installation can take anywhere from several minutes to over half an hour. During the process, the Mac Mini may reboot multiple times. Do not disconnect the cable until you see the initial macOS setup interface.
Final Setup
Once the M4 Mac Mini has flashed successfully, you’ll be greeted by the familiar macOS setup screen. From here, you can configure your language, Wi-Fi, Apple ID, and other options as normal. If you signed out of your Apple ID earlier, you can sign back in now without trouble.
Performance and Temperature Notes
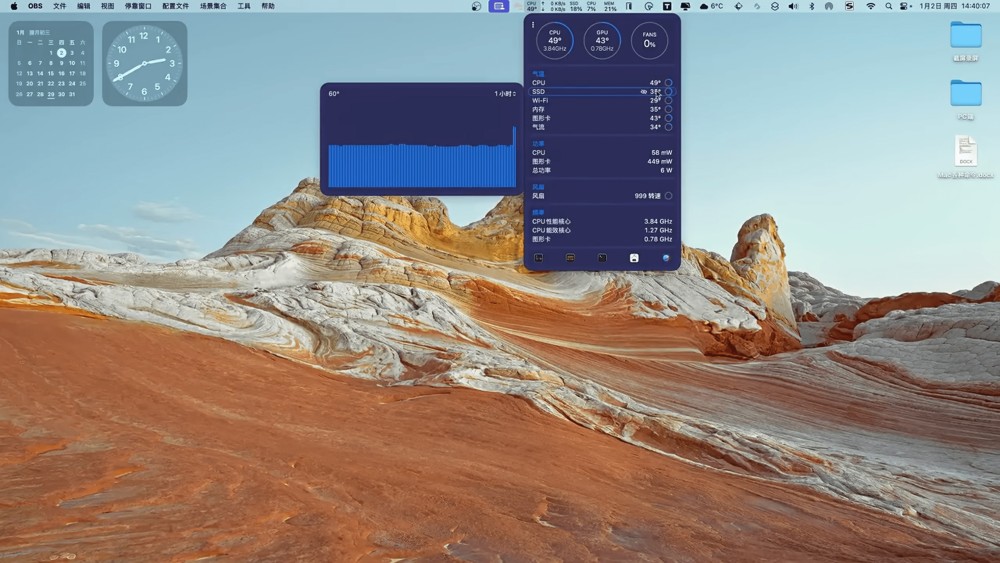
On my system, testing read and write speeds revealed the 2TB third-party SSD reaching around 4,800+ MB/s for writes and similarly high values for reads, especially when dealing with 1GB file transfers. Compared to the stock 256GB drive, that’s a substantial improvement.
The third-party SSD generally operates around 35℃ under normal workloads, which aligns closely with the stock drive’s temperature range. I’ve noticed no drastic spikes, even during large file copies. Of course, ensure that your Mac Mini’s internal fan and ventilation paths remain free of dust.
Helpful Troubleshooting Tips
Re-enter DFU Mode
If something goes wrong or the flashing process hangs, power off the Mac Mini, unplug it, and wait a moment. Then repeat the DFU mode entry step by holding the power button before reattaching the power cable.
Double Check Cable and Port
Sometimes Apple Configurator might not detect your device if the Thunderbolt cable is loose or plugged into a non-compatible port. Try a different port or a higher-quality Thunderbolt cable. Ensure your second Mac is fully updated and supports Apple Configurator correctly.
Network Speed
Slow or spotty internet can cause the system restore to fail. If possible, use a wired Ethernet connection on your second Mac. That will help keep the download stable.
Conclusion
Replacing the stock SSD with a third-party 2TB drive on your M4 Mac Mini is a fantastic way to breathe new life into your machine. You get more storage for apps and files, plus higher data transfer speeds for a smoother macOS experience.
The installation steps are straightforward once you know where everything is located. Just remember to take your time, handle components carefully, and follow proper procedures for system flashing. In the end, you’ll have a more robust Mac Mini that meets your storage and performance needs for years to come.
Enjoy your upgraded M4 Mac Mini!

Wow – I’m a retired IT admin so I’ve never delved into the inner workings of Apple computers – I’m considering getting a Apple Mac mini 4 and wanted to see how convoluted upgrading the drive could be.
IMHO – it’s pretty convoluted, and IMHO Apple wants it that way.
Still, I appreciate the thoroughness of your article.
Which SSD is recommended or did you use? Great tutorial thanks
Thank you! I’m glad you liked the tutorial. The SSD I used in my Mac Mini is no longer available, it was a no-name Chinese brand. I recommend checking out my Amazon link to see a list of options. Be sure to read the reviews carefully and choose one with good feedback. Hope that helps!